EZView Mobile App
Monitor your cameras anytime, anywhere from your smartphone
Download EZView
Get the official UniView EZView app for your device
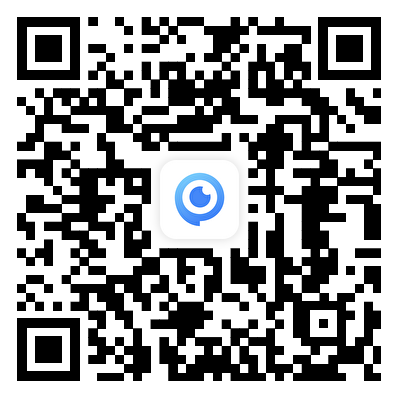
Scan to download — opens App Store on iPhone, Android download on other devices
Key Features
- Live video streaming from all cameras
- Playback recorded footage by date & time
- Receive instant alarm notifications
- Two-way audio communication
- PTZ camera control
- Take snapshots & record clips
- Share device access with others
Getting Started
Follow these steps to set up mobile access to your cameras
Live View
Watch your cameras in real-time from the EZView app
Starting Live View
- Open EZView and log in to your account
- Tap the "Devices" icon (top right)
- Select your NVR or camera from the list
- Check the cameras you want to view
- Tap "Start Live View"
Live View Controls
Switch between 1, 4, 6, 9, 12, or 16 camera views
Capture still images to your phone
Record live video to your phone
Enable sound from camera microphones
Toggle Low/Medium/High video quality
Press and hold to talk through camera
Video Quality Settings
Choose the appropriate quality based on your network connection:
Playback Recordings
Review recorded footage from any date and time
Accessing Playback
- From Live View, tap the "Playback" button
- Select the camera(s) to view (up to 4)
- Tap "Play" to load recordings
The timeline will appear at the bottom showing available recordings.
Selecting Date & Time
- Tap the Search or Calendar icon
- Select the date you want to review
- Set the specific time if needed
- Tap OK to jump to that moment
Using the Timeline
The timeline at the bottom of playback shows when recordings exist:
- Continuous recording available
- Motion/event recording
- No recording for that time
Jump to that time
Scroll through time
Zoom in/out for precision
Playback Controls
Play/Pause
Speed (1x, 2x, 4x...)
Snapshot
Audio
Live View
Split Search
Split Search Feature
The Split Search feature helps you quickly scan through footage to find specific events:
- Tap Split to divide your video segment into 4 or 9 parts
- All segments play simultaneously at high speed
- Spot the segment containing your event
- Tap that segment and choose Play to view in detail
- You can split again for even more precision
Alarms & Notifications
Stay informed when your cameras detect activity
Enabling Push Notifications
- Open the EZView app menu (☰)
- Go to "Alarm Notifications"
- Tap "Allow Notifications"
- Enable notifications for each camera
- Make sure your phone allows notifications from EZView
When Alarms Trigger
When motion or an event is detected:
- You receive a push notification
- Tap the notification to open the app
- View live video immediately
- Review the recording that triggered the alarm
- View snapshot images from the event
NVR Operations
Using your UniView NVR directly with a connected monitor
Mouse Controls
- Left Click: Select or confirm
- Double Click: Full screen / Exit full screen
- Right Click: Open context menu / Go back
- Scroll Wheel: Navigate lists or zoom timeline
- Click & Drag: Draw areas or move objects
Accessing the Main Menu
Right-click anywhere on the Live View screen and select "Menu" to access all NVR settings and features.
Change how many cameras display on screen:
- Look for layout icons at the bottom of the Live View screen
- Click the icon showing your desired arrangement:
Use the Previous/Next arrows to navigate between screens if you have more cameras than windows.
To hear audio from cameras with microphones:
- Move your mouse over the camera window
- A toolbar appears at the bottom of the window
- Click the Speaker icon 🔊
- If muted, the icon will have a line through it - click to enable
Access Playback
- Right-click and select "Playback"
- Or access from the Main Menu → Playback
Select Cameras
- Check the cameras you want to view in the camera list
- Click "Max Cameras" to see maximum viewable at once
Select Date
- Click on the date in the calendar
- Use arrows to change months
- Days with recordings have colored triangles:
- ● Blue = Continuous recording
- ● Orange/Red = Motion or event recording
- Double-click the date to load recordings
Navigate the Timeline
- Click anywhere on the timeline to jump to that time
- Drag left/right to scroll through time
- Use zoom buttons to zoom in for precision
- Colored bars show when recordings exist
- Insert a USB flash drive into the NVR
- Navigate to the footage you want to save in Playback
- Click the Clip or Backup button
- Mark the start point and end point of your clip
- Click Save or Backup
- Wait for export to complete
- Safely remove the USB drive
Troubleshooting
Common issues and how to resolve them
Can't connect to cameras
- Check your internet connection
- Verify the NVR is powered on and connected to the network
- Confirm your w3K representative has configured your access
- Try deleting and re-adding the device in EZView
No audio from cameras
- Verify the camera has a microphone (check specs)
- Tap the speaker icon to enable audio
- Check your phone or monitor volume
- Audio Stream must be enabled in camera settings
Can't find recordings
- Verify the NVR has a hard drive installed
- Check the correct date is selected
- Confirm recording schedule is enabled
- Check system time is correct on NVR
Poor video quality
- Switch to a faster network (WiFi vs. mobile data)
- Lower the quality setting to reduce buffering
- Close other apps using bandwidth
- Move closer to your WiFi router
Need Help?
Contact w3K Security for assistance with your camera system
w3K Security Support
Our team is here to help with installation, configuration, and troubleshooting of your UniView security system.